Struggling with how to change nameservers for your domain name?
Your domain’s nameservers control important DNS settings for the domain, like pointing visitors’ browsers to the server where your actual website is located. You’ll typically need to change them if you’re changing web hosting or implementing a security/performance service, such as Cloudflare or Sucuri.
Because it’s a somewhat technical process, figuring out how to change nameservers can feel overwhelming to a lot of webmasters.
Don’t worry, we’re here to help – we’ll show you step-by-step how to change nameservers at four of the most popular domain registrars:
- Godaddy
- Namecheap
- Bluehost
- Hostgator
Unfortunately, the exact process is different for every single domain registrar, so we can’t show you “one tutorial” that works for all registrars. But there’s a good chance that you’re using one of the options above, in which case all you need to do is click above to jump straight to that section.
The only thing we’ll assume is that you know the new nameservers that you want to use – typically, they look something like this:
ns1.example.com
ns2.example.com
You’ll have two nameservers at a minimum, but in some situations you might have three or even four.
If you’re not sure where to find the new nameservers that you need to use, we’ll share some quick tips on that before we get into the guides for popular domain registrars.
How to find your new nameservers
Before you can change your domain’s nameservers, you first need to know the new nameservers that you want to use.
So – where do you get these new nameservers?
Well, that depends on what action you’re taking.
If you’re switching to a new web host, you’ll get your nameservers from your new host. Some common areas where you can find these new nameservers are:
- Your welcome email.
- Your hosting dashboard.
- Your host’s support documentation.
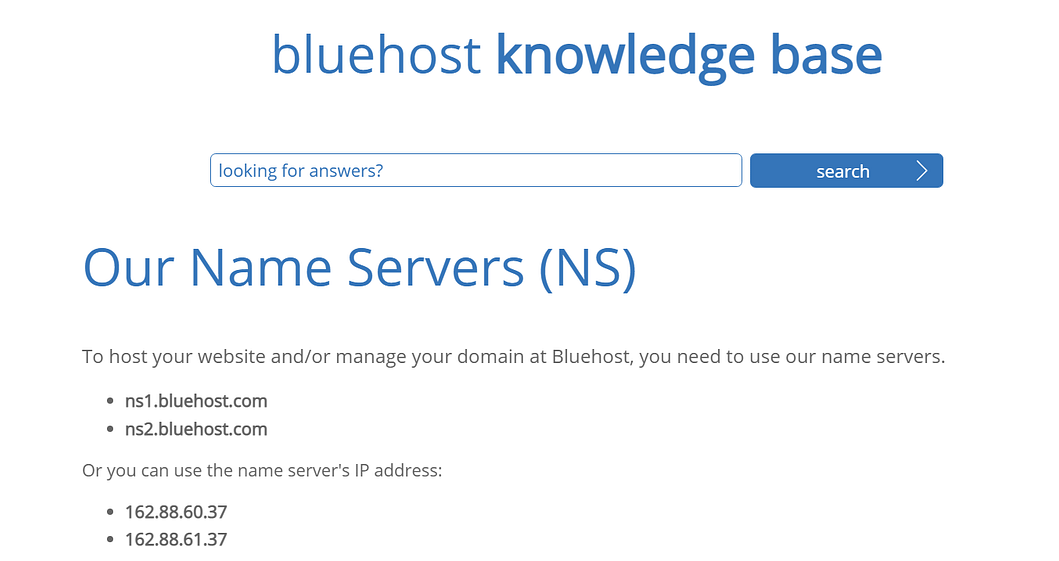
For example, Bluehost publishes its nameservers in a help article:
You also might need to change your nameservers if you’re switching to a reverse proxy security or content delivery network (CDN) service, such as Cloudflare, Sucuri firewall, or other similar services. If that’s the case, you should get your new nameservers as part of the setup process when you add your domain to that service.
For example, if you’re setting up Cloudflare, Cloudflare gives you the new nameservers to use in the setup wizard:
How many nameservers should you have?
You should always have at least two nameservers. However, it is possible to have three, four, or even more nameservers. Each nameserver just adds another level of redundancy, so some services give you more than two just to be extra sure there’s always a working nameserver.
You should add all the nameservers that your host/service gives you. Normally, that will just be two nameservers, but if there are more than two, make sure to add ’em all.
How to change nameservers: GoDaddy
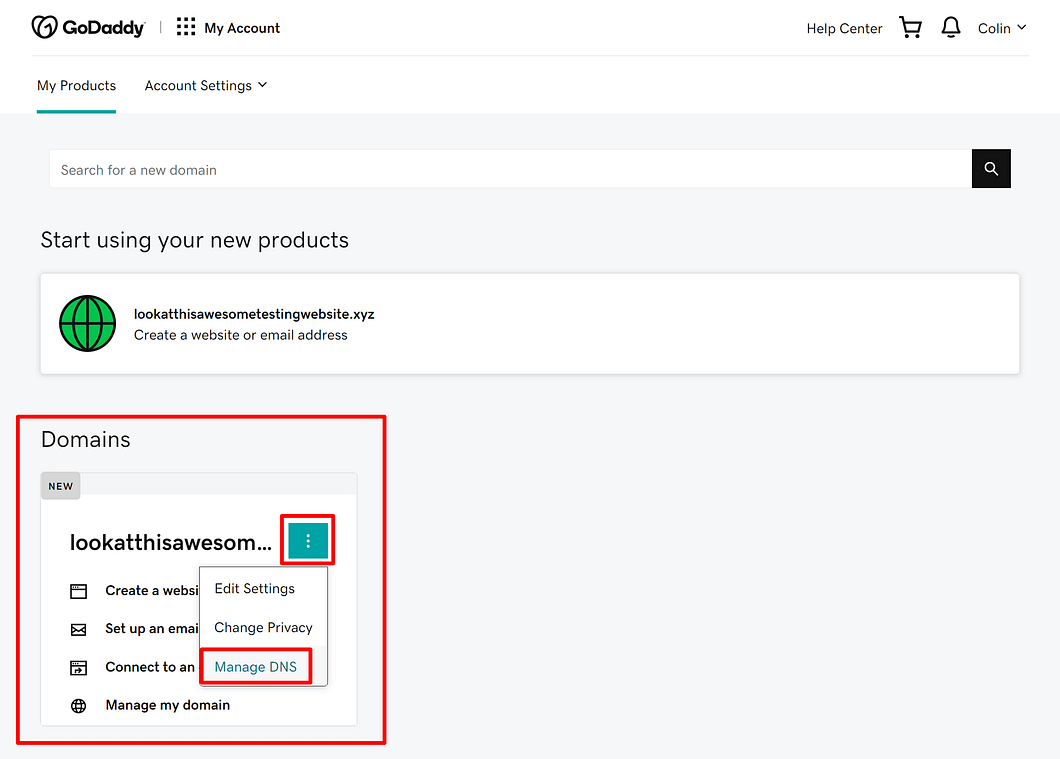
To change nameservers at GoDaddy, get started by logging into your GoDaddy account. If you go to the My Products area, you should be able to find your domain there in the Domains section.
Once you find your domain name, click on the three dots icon to expand additional options and choose Manage DNS:
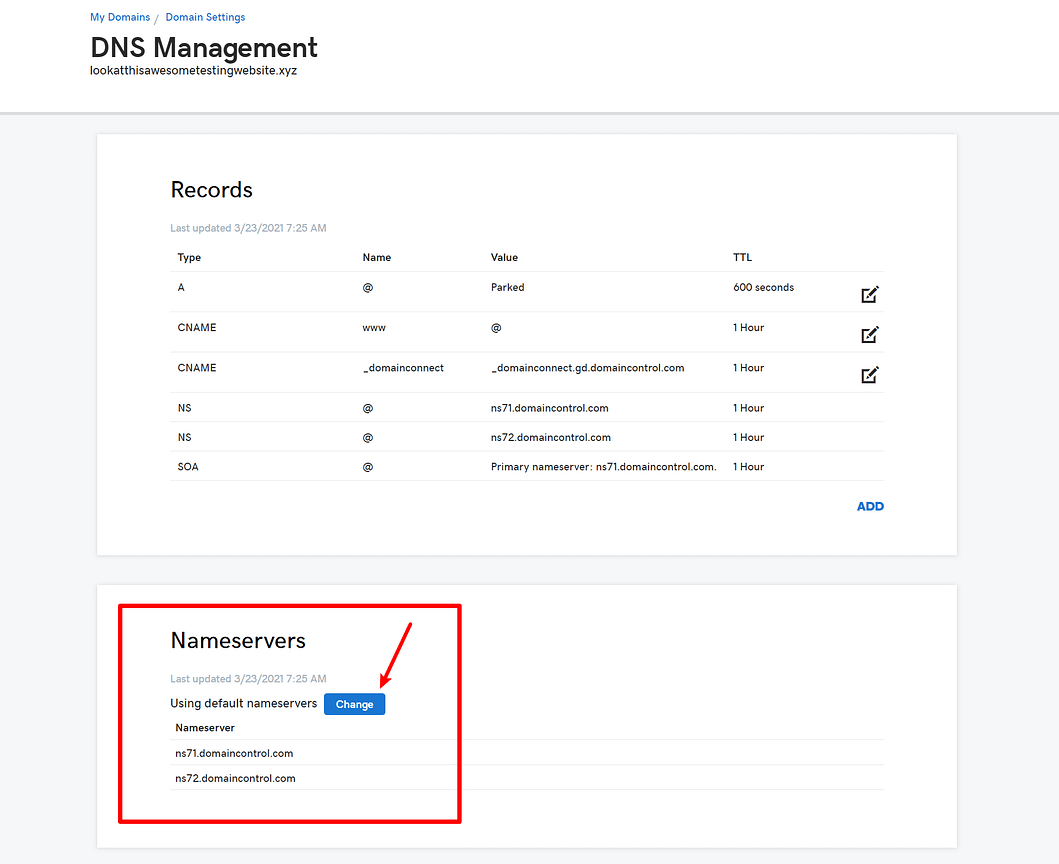
In the DNS Management area, look for the Nameservers section and click the Change button:
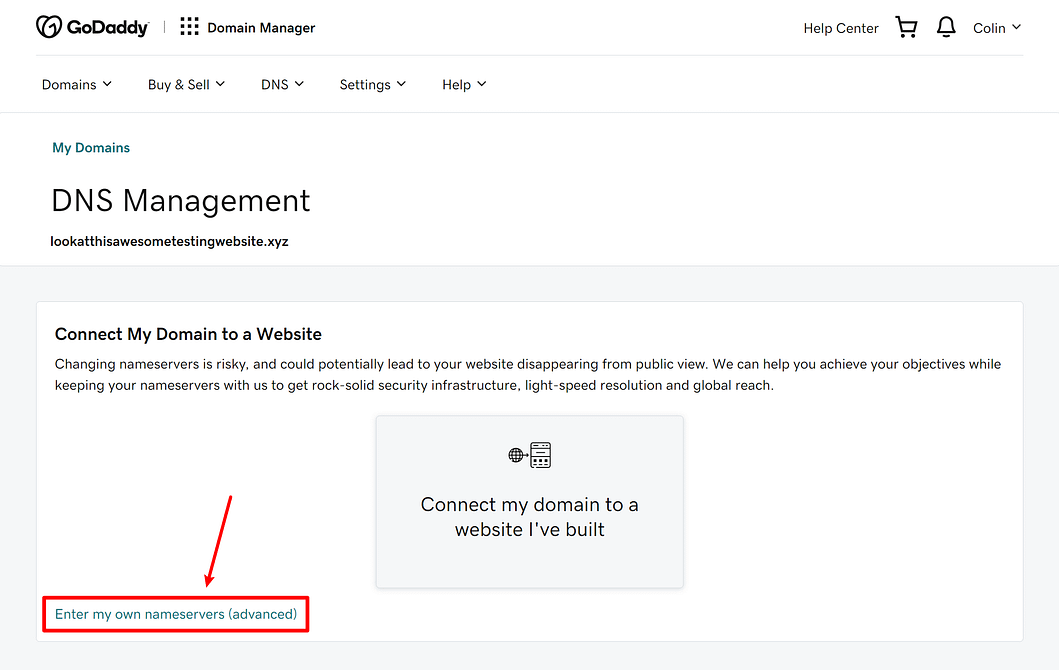
On the next screen, choose the small Enter my own nameservers (advanced) option (if you’ve already set your own custom nameservers before, you’ll be able to skip this step).
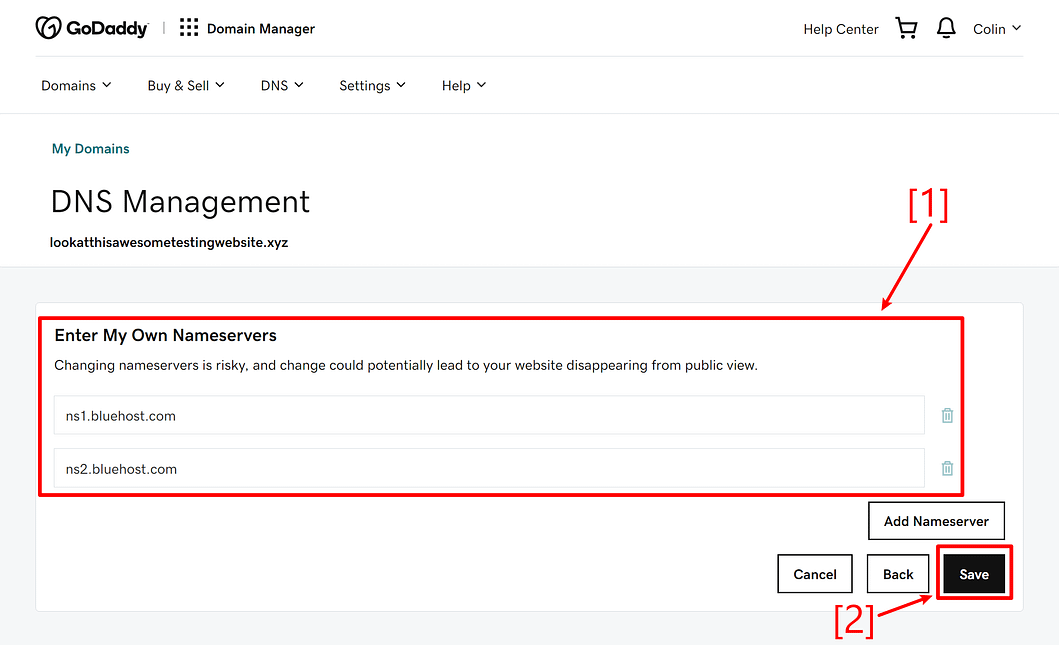
Then, you’ll be able to enter your new nameservers. If you have more than two nameservers, you can click the Add Nameserver button to add more input fields.
Once you’ve entered all your nameservers, make sure to click the Save button to make your changes live:
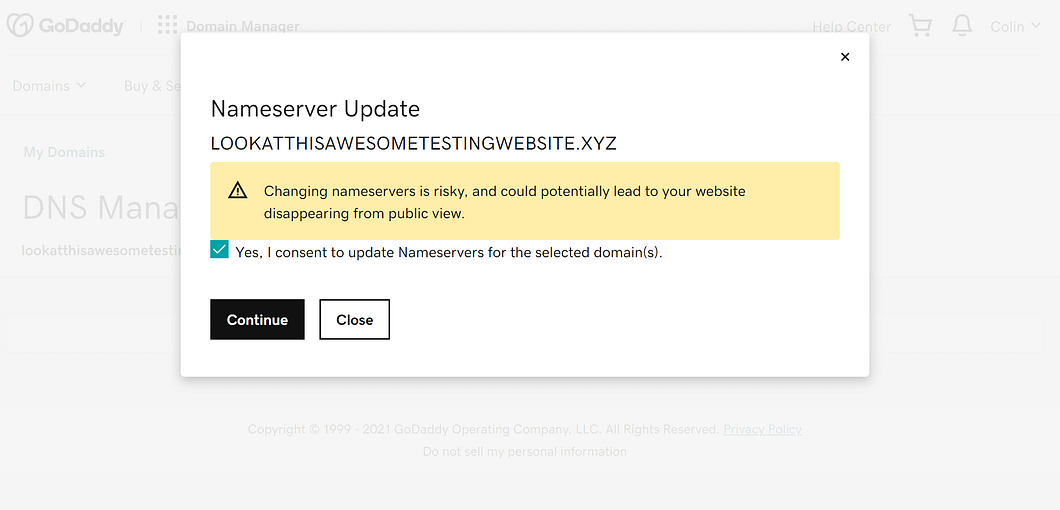
If this is your first time changing nameservers, GoDaddy might show a popup warning you that it’s “risky.” Check the box to consent and then click Continue:
And that’s it! You’ve just changed your nameservers at GoDaddy. It might take up to 24 hours for the changes to take effect.
In case you are looking for a cheaper, or more WordPress-optimized hosting solution, then here are the best GoDaddy alternatives in the market.
How to change nameservers: Namecheap

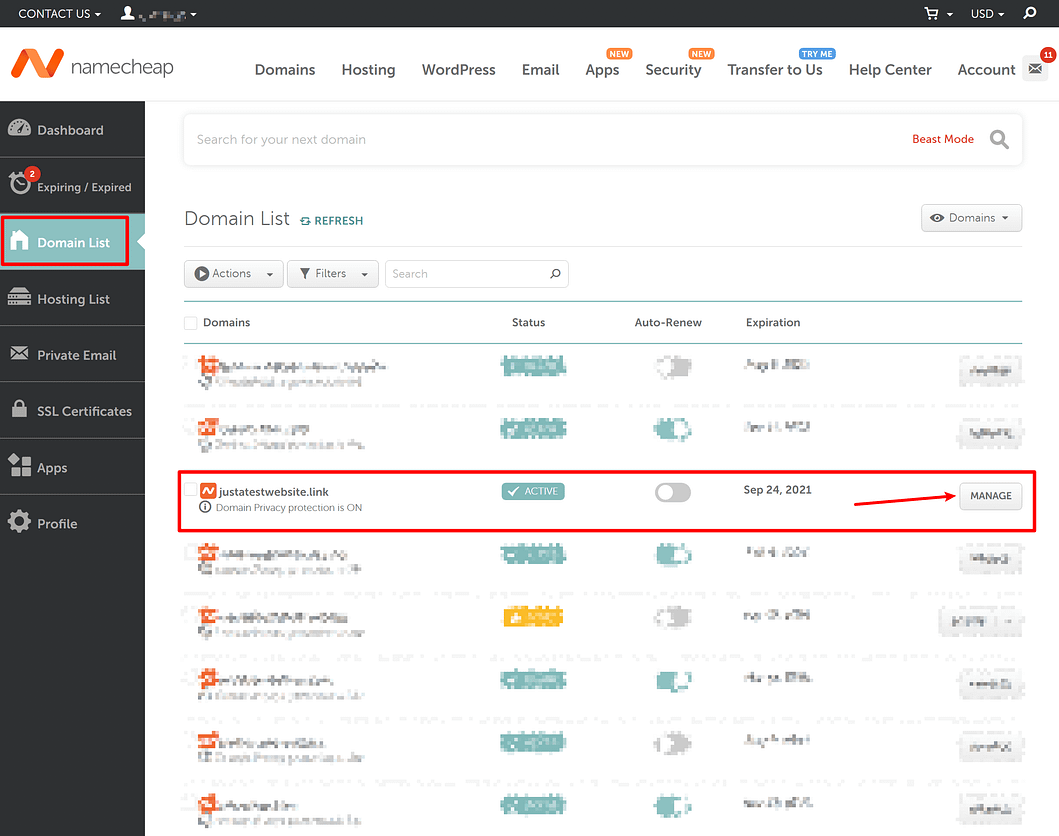
To change nameservers at Namecheap, get started by logging into your Namecheap account. Then, go to the Domain List area in your dashboard and click Manage next to the domain name for which you want to change nameservers:
Then, look for the Nameservers setting in the domain’s settings area. You might see one of two things:
- If you haven’t changed the domain’s nameservers yet, you’ll see Namecheap BasicDNS.
- If you already set your domain’s nameservers, you might see Custom DNS and your domain’s existing nameservers.
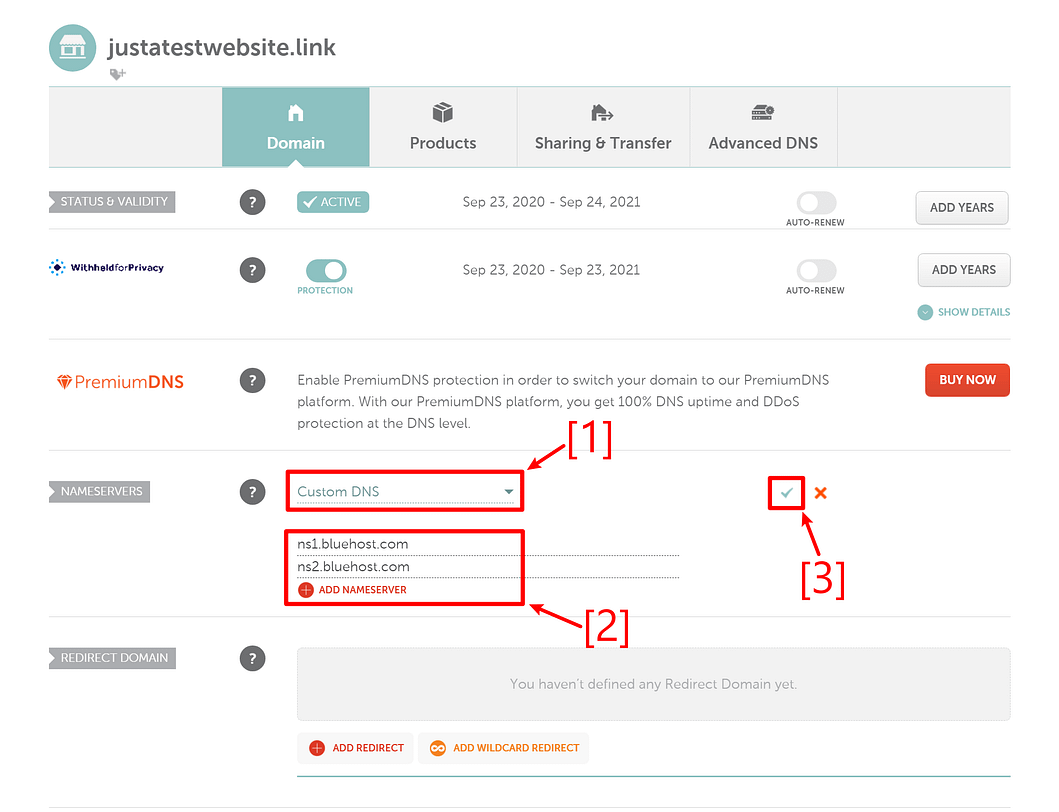
If you see Namecheap BasicDNS in the drop-down, you’ll first need to use the drop-down to change to Custom DNS.
Once you’ve done that, you can add your new nameservers (or overwrite the existing nameservers if they already exist).
If you have more than two nameservers, you can use the Add Nameserver button to add more fields for those additional nameservers.
Once you’ve entered your new nameservers, make sure to click the green checkmark to save your new settings:
And that’s it! You just changed your nameservers at Namecheap. It might take up to 24 hours for your new changes to take effect (but it’s usually a lot faster).
How to change nameservers: Bluehost

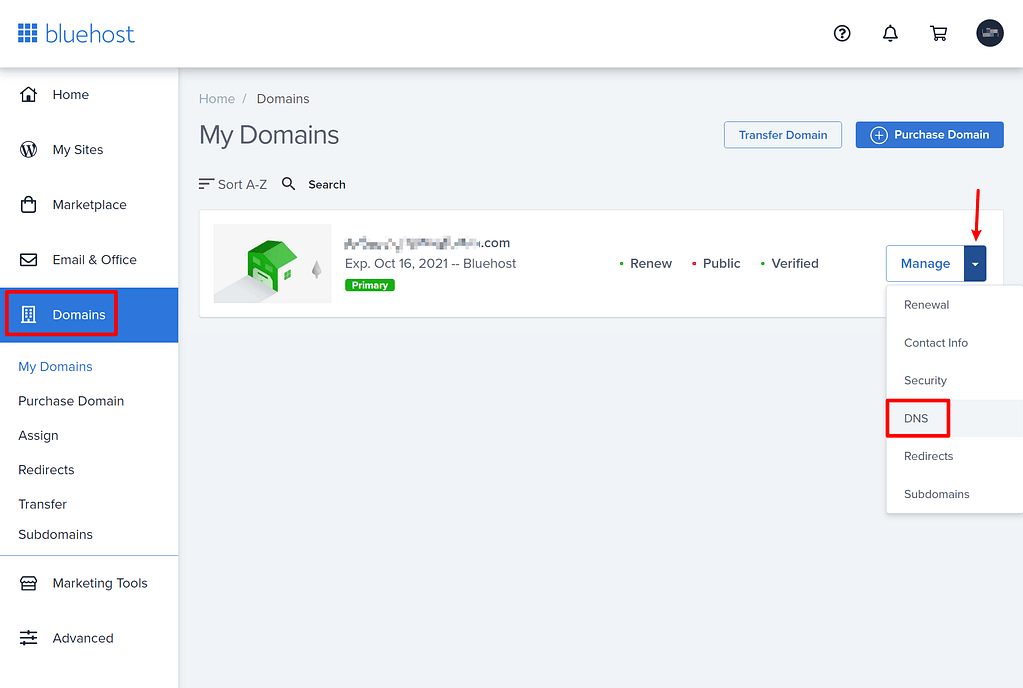
To change nameservers at Bluehost, log in to your Bluehost dashboard. Then, go to the Domains area in your Bluehost dashboard.
Once in the domains area, click the little arrow next to the Manage button for the domain for which you want to change nameservers. In the drop-down menu that appears, choose DNS:
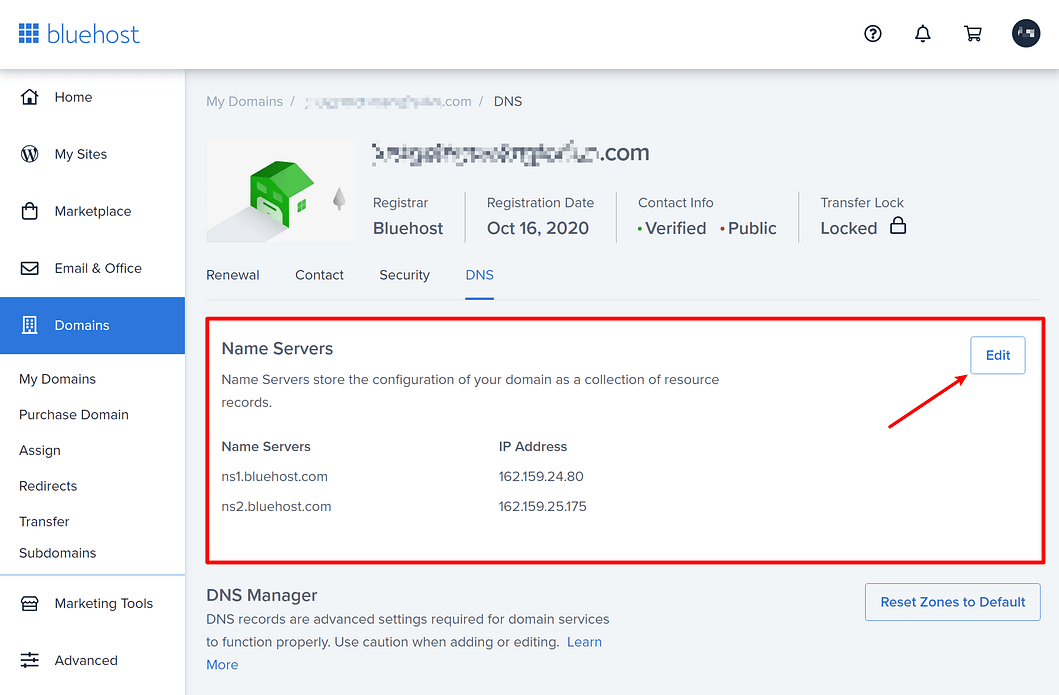
On the next screen, click the Edit button next to the Name Servers section:
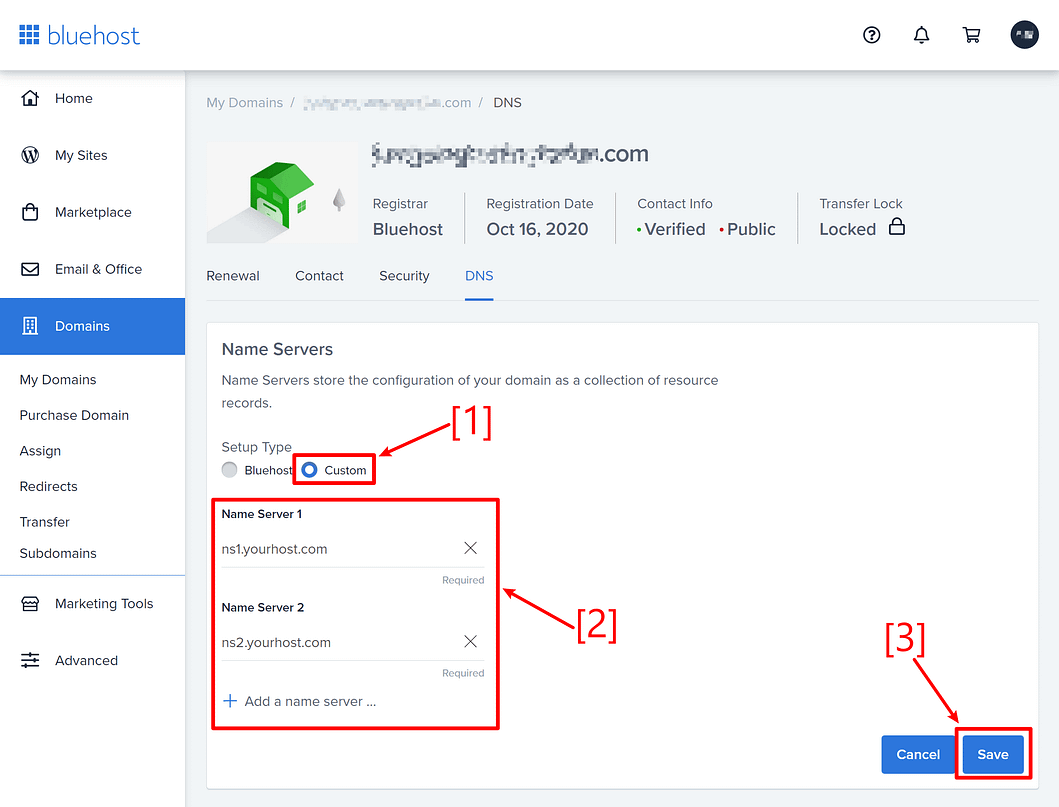
Then, choose Custom under Setup Type in the option that appears. Once you choose Custom, you can enter your new nameservers in the boxes below. If you have more than two nameservers, you can click the Add a name server link to add more records.
Once you’ve added all your new nameservers, make sure to click Save to make your changes permanent:
That’s it! But it might take up to 24 hours for your new changes to take effect.
How to change nameservers: HostGator

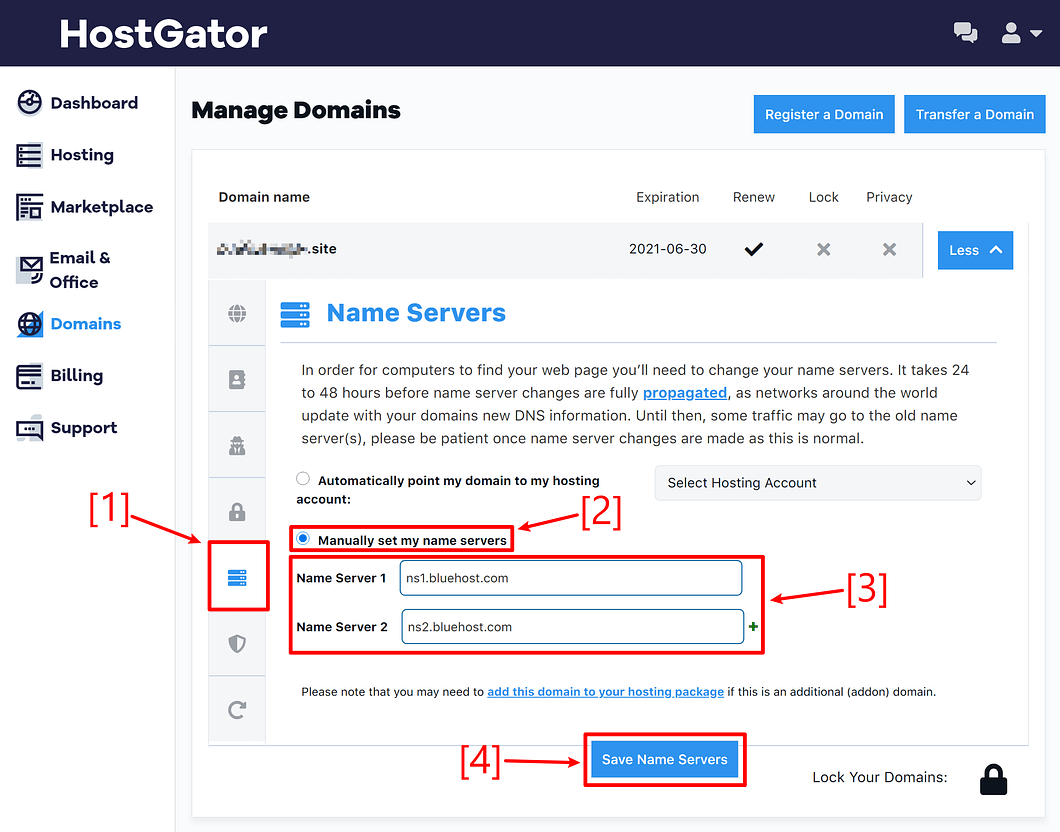
To change nameservers at HostGator, log in to your HostGator account portal and go to the Domains section. Then, click the More button next to the domain for which you want to change nameservers.
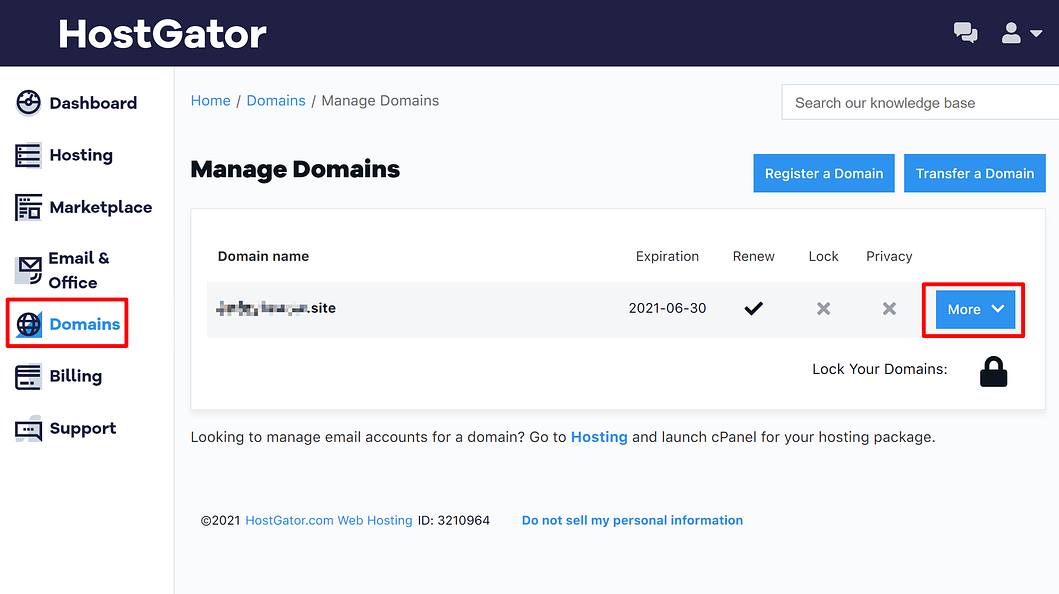
This will expand an additional settings area without reloading the page.
In this new settings area, go to the Name Servers tab. Then, select the Manually set my name servers radio button.
Once you do that, you’ll be able to enter your domain’s new nameservers. If you have more than two nameservers, you can use the plus icon to add more input fields.
Once you’ve added all of your nameservers, make sure to click the Save Name Servers button to save your changes:
That’s it! It might take up to 24 hours for your new changes to take effect.
Final thoughts and troubleshooting
To finish things out, let us end with a reminder that, as we mentioned in all the sections above, nameserver changes do not always take place right away.
In fact, it can take up to 24 hours for your nameserver change to take effect, though usually the changes will be active within 30 minutes or so.
The key thing here is that you shouldn’t necessarily assume you did something “wrong” just because your new nameservers didn’t start working as soon as you hit the save button. Just wait a bit and you should see your new nameservers start working within 30 minutes or so (though it can be longer).
And that finishes up our post – do you still have any questions on how to change nameservers at GoDaddy, Namecheap, Bluehost, or HostGator? Let us know in the comments section and we’ll try to help!